Here is a step by step guide on how to make a gift tag with something a little different.

Handmade by Emma Whyley
Things you will need:
Diecut Card Shapes Large Alteration Tag S57324Clear Acetate Sheets Extra Thick - S57320
Beads and Glitter Red - S57076
Ultra Clear Tape Polyester Tape 3.5mm x 16m S56995
Punch
Ribbon
Small Alphabet Stamps
Instructions:
To make the decorative tags, first select your punch and position onto the tag. Punch a corresponding design onto the second tag. This will be the back to your tag (encasing the glitter/acetate pocket).
Cut the acetate to size (we used a trimmer), you will need two pieces of equal size, large enough to cover the punched design. Add 4 strips of ultra tape of each edge of one piece of acetate.
Remove 3 of the backing strips and position the 2nd piece of acetate on top to make your pocket, open and fill with glitter and seal.

Put Ultra tape around the edges on the back of one tag and add the now sealed acetate/glitter pocket over the punched put area.
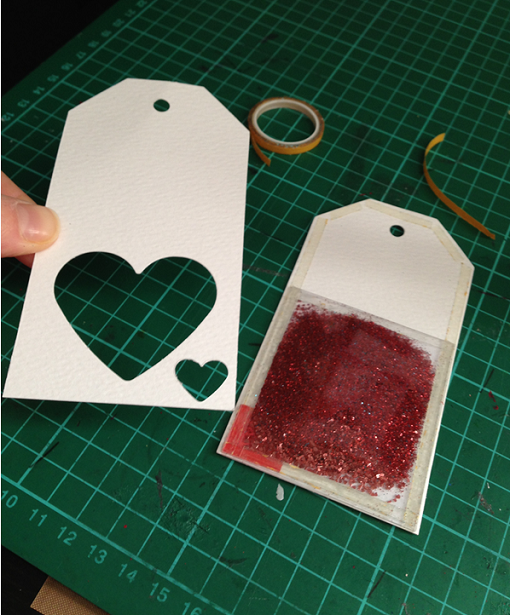
Line up the 2nd tag and stick to the back of the first, enveloping the acetate pocket within. We added a small piece of red card over the smaller red heart between these two layers of tag.
We then decorated the tag with dome co-coordinating ribbon and added a sentiment with small alphabet stamps.

You can use this method with many other designs. Here is an example of acetate pocket using a different medium. For this tag we used Mica Flakes and followed the above steps to achieve the result as seen in the picture.
We then decorated with butterflies punched from patterned paper, hemp cord, aged teal embossing powder (sprinkled on to the tag and heated from underneath with a heat gun). We then added some gems using the hot glue gun.

No comments:
Post a Comment