Tuesday 25 March 2014

Spring Gift Tag

Easter is on its way - Why not attach a "Happy Spring" tag to brighten up any present!


Handmade by Emma  Whyley 


Things you will need:

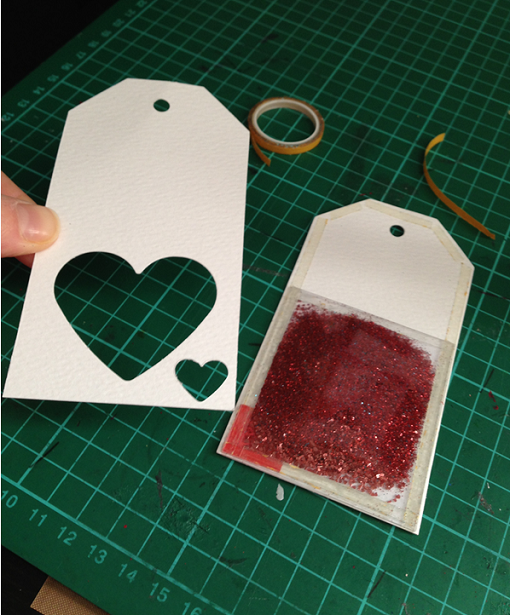
Diecut Card Shapes Large Alteration Tags S57324
Diecut Card Shapes Flowers S57295
Hotmelt Glue Gun S57234
Hotmelt Glue Refills S57235
Crafting Sheet S57132
Stardust Glitter Card BottleGreen SCR51063510BOTTLE
Layer Perfect S57322 / S57321
Beads and Glitter BlueS57078
Pick Up Pencil S57265

Dotty Flower Trio Stamp set
Happy Spring Stamp
Versafine Ink Pad
Dreamweaver Metallic F/X powder
Pokey Tool
Foam Piercing Mat
Stencil Brush
Tombow Pen
Embroidery Thread
Tapestry Needle

Instructions:

On the non-stick craft sheet, make 6 petals and one additional circular gem for the flower centre, with your hot melt glue gun and glue stick.


Once these are dry brush over with Dreamweaver powder, the more you ‘buff’ the petals the deeper the colouring will be. For your flower centre sprinkle the micro beads to make this stand out.


Assemble the flower shape, adding a hot glue blob to secure in place. Once this is dry add the circular gem in the centre of the flower.


Use the layer perfect to pierce holes for the stem of the flower onto the white tag. Cut a leaf shape from the green stardust card and pierce holes down the centre.


Using the embroidery thread and needle, stitch the stem and the leaf into place on the tag.


Stamp directly onto the Die Cut flower and colour in sections with the Tombow pen for additional detail.


Curl the edges of the flowers with a pick up pencil and layer the die cut flowers on top of each other. #


Secure in place with the hot melt glue gun.


Place the hot glue flower in the centre of the die cut flower and secure onto the tag with the hot glue gun. Add a stamped sentiment ‘Happy Spring’.


You can create the same card many time with different coloured petals, keeping the centre the same or changing the colours, Even using different Tombow pens or none at all create a different look for this tag.


Have Fun Crafting!


Thursday 20 March 2014

22nd March - Demonstration Days in Your Area

We have three fantastic Demonstration Days and one fabulous event happening this week for you.

Hobby Crafts Show at The NEC Birmingham starting this week. Michelle will be on A1 Crafts stand. Their stand number is C11. Demonstrating our fabulous Layer Perfect Tool along with lots of other Stix2 products to make your crafting even more fun and inspiring. Do come and visit us on either Thursday, Friday or Saturday to join Michelle  and the A1 Crafts team.

Paper 'n' Card in Barnsley. Karen will be joining Dot and her girls for the day showing how to use the fantastic new Stix2 products.

Cardwell Nurseries The craft shop in Gourock have Emma joining Pauline & her team demonstration new techniques and sharing her handy tips using our fabulous Stix2 products.

Craft Zone in Pontefract, have Kirsty visiting for the day. She will be joining Wendy and her team creating some fantastic new projects, using Stix2 products.

For more details on each crafting day please go to our events page www.stix2.co.uk

Have Fun Crafting!


Wednesday 12 March 2014

15th March - Demonstration Days In Your Area

We have 5 fantastic fun filled crafting days set up for you on Saturday 15th March:

Pantiles Papertole, in Tunbridge Wells: Here, we have Michelle to join Valerie and the team for the day to help you with all your questions and give you great ideas and tips for your crafting.

Crazy About Cake Craft, in Chesterfield: Karen will be joining Jackie and her team to show you our new and exciting products and how to use them.

Nina's Craft Shop, in Burgess Hill: The team have welcomed Jayne to assist them in all things 'crafty'.

The Pedlars Tray, in Wyvale: Lisa will be coming along to join Jane and her team for the day.

Mad Hatters Wee Craft Shop, in Turriff: Emma will be coming along to help Wendy and her team with all your enquiries.

For more details on each crafting day please go to our events page www.stix2.co.uk

Have Fun Crafting!

Thursday 6 March 2014

Beautiful Window Tags!

Here is a step by step guide on how to make a gift tag with something a little different.


Handmade by Emma Whyley


Things you will need:

Diecut Card Shapes Large Alteration Tag S57324
Clear Acetate Sheets Extra Thick - S57320
Beads and Glitter Red - S57076
Ultra Clear Tape Polyester Tape 3.5mm x 16m S56995

Punch
Ribbon
Small Alphabet Stamps

Instructions:

To make the decorative tags, first select your punch and position onto the tag. Punch a corresponding design onto the second tag. This will be the back to your tag (encasing the glitter/acetate pocket).


Cut the acetate to size (we used a trimmer), you will need two pieces of equal size, large enough to cover the punched design. Add 4 strips of ultra tape of each edge of one piece of acetate.
Remove 3 of the backing strips and position the 2nd piece of acetate on top to make your pocket, open and fill with glitter and seal.


Put Ultra tape around the edges on  the back of one tag and add the now sealed acetate/glitter pocket over the punched put area.


Line up the 2nd tag and stick to the back of the first, enveloping the acetate pocket within. We added a small piece of red card over the smaller red heart between these two layers of tag.
We then decorated the tag with dome co-coordinating ribbon and added a sentiment with small alphabet stamps.


You can use this method with many other designs. Here is an example of acetate pocket using a different medium. For this tag we used Mica Flakes and followed the above steps to achieve the result as seen in the picture.
We then decorated with butterflies punched from patterned paper, hemp cord, aged teal embossing powder (sprinkled on to the tag and heated from underneath with a heat gun). We then added some gems using the hot glue gun.


Have Fun Crafting!